Setting up a photography website is one of the most important things you can do for your business. It can also be very expensive. If you can afford it, I recommend finding a good designer
and having them do it for you. If you can’t, don’t worry, I will help you out. I have put together a step by step video of how to set up a WordPress site for your photography business. This is a part one of a two part series. I will walk you through hosting with Hostgator.com and if you use coupon code PHOTOTIPSHQ, you will save 25% off your purchase. I do make a small commission if you use that code and I thank you in advance. I recommend Hostgator because I use them for all the sites I have, I would never recommend something that I don’t use myself. After the hosting is set, you will need to upload WordPress. At this point you will want to look for the “quick install” or “famico deluxe” button. When you click that, you will look for WordPress on the lefthand side under blogs. I didn’t mention this in the video but it can take up to 24 hours to for WordPress to install, but it usually takes around 2 hours. There is plenty of work to be done while you wait.
Here is a check list of things to have done before you start building your site.
- Select a theme: I use the “Chocolate Theme”. I love how clean it is. Check it out here
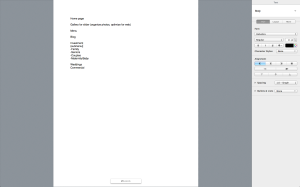
- Pick your pages: Home, Investment, Blog, Email Opt In, About, Weddings, Portfolio, Gallery, etc. These pages will represent the menu on your site. If you need a little inspiration search the web for photographers and see what they have done. In your word processor create a page for each of the web pages you would like on the site. Once you have that list compiled you can begin creating the content for each page.
- Content creation: What do you want on your home page, your about page, your investment page? My home page is a full page slide show of my work with a small menu on the left hand side. On my investment page, I have fully written out my prices and what each package includes. This is a great way to save time when someone asks about prices and what’s included. This will take a little time to do, but once you have it done, it’s done. Make sure to include on each page and in your blog post a call to action, encouraging your readers to sign up for your email list. Offer them a coupon as an incentive to sign up. To learn more about email marketing, subscribe to my email list to receive a free course on email marketing. Click here to sign up. (see what I did there?) That training course will show you how to collect emails through your site and Facebook. It will also walk you through how to set up a web form on your site. When coming up with content, make a folder on your computer for each page and what will go into it. You can type out the text in a word processor and copy and paste into the web pages. You will want to get your photos organized for each gallery. If you don’t do these steps your site will become an ongoing project that you won’t get back to, so try and get it done as quickly as you can. I speak from experience and it sucks having that looming in the back ground everyday. Put as much as you can into preparing, and getting your site up will go much faster. Here is what page should look like when you’re done.
 Make sure to get all the photos you want on your site into folders. Organize them by page and gallery. Make your about page awesome! Let people know who you are and what you are about, include a story or picture of your family. Having a picture of yourself on the site will make it more inviting to potential clients.
 - Include a “blog” page: Get ready to start blogging. A blog is a great place to document your work for your new clients to see. It will give them a sample of what each shoot is like and it will let them get to know you a little better. Writing a blog post and sending the link to your clients will allow them to share the link to your site on social media. That’s digital word of mouth advertising at its best. Make sure to get permission from each client to put them on your site. It will become your yearly journal and allow you to look back on your year of hard work. In part two of this series I will go over how to make some extra money with your blog.
Once all of your content is ready you can begin building the site. Follow the steps in the video below to begin building.
Part two will include:
- Adding more pages
- Adding a gallery
- Creating a sub menu
- Using plugins
- Adding affiliates links
- Using online resources